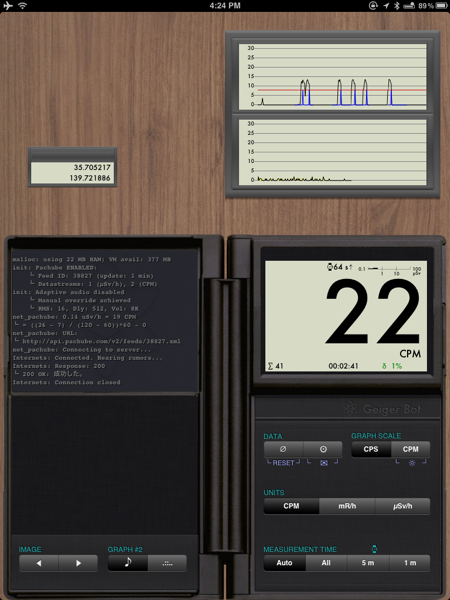
I've been spending the past couple of months in Tokyo. Worried about the radiation, I brought my DRGB-90 russian geiger counter /dosimeter that I had bought a couple of years ago. Unfortunately, the DRGB is a rather old analogue design and the readings at low (natural background radiation) are rather imprecise. There's an application on iOS called Geigerbot that is a sophisticated click-counter. Set up correctly, it can give you precise microsievert per hour readings. It also interfaces with Pachube which allows historical readings. Now Geigerbot can use the microphone on your iPad/iPhone to detect the geiger counter's audible clicks, but it will of course also pick extraneous external noise. I wanted to directly interface my DRGB-90 with my iPhone so I could have more precise readings. Unfortunately, the DRGB doesn't have an external speaker jack or any other outputs. Here's how I hacked it. |
Step 1: Take it apart
It's very important to note that geiger counters produce very high voltages (400 volts in the case of DRGB-90). Before opening the case, remove the batteries. This is what it looks like on the inside. The long cylinder is the SBM-20 geiger-muller tube. It came wrapped in aluminum foil from the factory in order to give it better shielding against beta radiation (in order to emphasize gamma radiation).

I was disappointed to not see the speaker when I opened it up. Hmm, it must be on the back side of the printed circuit board. The board didn't up easily, it took some wrenching
Step 2: Under the PCB
Lifting up the PCB (with the help of a sharp scoring knife to break the PCB conformal coating). The piezo speaker becomes visible. I wanted to patch into the speaker. Using my multimeter, it becomes clear that the piezo speaker frame is grounded to ground and there's a small (invisible in the photo) lead to the piezo.

Step 3: Patching into the speaker output
I cut the speaker output lead and soldered in my own lead.

Step 4: The speaker jack
I then hacked in my own headphone jack using the lead from the piezo speaker as the positive terminal and the battery ground as the ground. On the headphone jack end, I used the necessary bypass capacitor and voltage dividing resistors that the iPhone needs to recognize a microphone input, as noted on the Geigerbot homepage. I could have built this into the unit itself if I had thought a bit more about it.

Step 5: Putting it all together
Here it is all put together and hooked into my old iPhone 3G which had been previously destined for the dust box.

The iPhone then connects into my Pachube account for a real-time and historical data feed.
Do overs: What I would do differently
If I were to do it over again, rather than patching into the speaker output, I'd patch into the signal LED (or scrape out enough of the conformal coating / potting to find the signal trace). The DRGB-90 modulates the sound so it's not a clean 'click' and sometimes Geigerbot gets confused when it was set to auto-detect. The signal LED would be a cleaner signal for geigerbot. In any case, once I used manual settings on Geigerbot (rms window 256; delay 512; volume 8000), it seems to read the clicks quite well, so I don't think I'll ever get around to doing this.
Second, I might put the bypass circuitry and voltage divider inside of the DRGB-90 so I didn't have to build it into the cable. But that'd take away one of the features I like which is that when I remove the input jack, the DRGB-90 goes back to clicking using its internal speaker. In order for it to have *both* the internal speaker option and for the mic cable to be functional, I'd have to do more bodging than I think it is worth.
Finally, although one of the sites above notes that the DRGB-90 should last 300 hours or just over twelve days on its three alkalines, I think I'll build a battery bypass for it, so I can keep it plugged in. This is perhaps the only mod that I actually will do.
----
Addition 2012.01.11: Higuchi Osamu who has been instrumental in translating Geigerbot into Japanese also has written a basic Adobe Air application that can run on Macs and PCs that can take the mic-in input and analyze it Geigerbot-fashion. More info here: http://www.higuchi.com/item/636. Still no sign of any reasonable Androids version though.


The author of Geigerbot responded to my queries (thanks Nick!) and let me know that another person has hacked a DRSB-01 to provide a counter output. That page is here: http://www.bidouille.org/hack/geigerusb
The DRGB-90 must be an older design since it uses all discrete components (no ICs).
In any case, thanks Nick!
Karen
Note that there's a sudden drop in uSv/hr around January 11. That is when Nick Dolezal convinced me that the SBM-20 needs a compensation offset of -13 CPM to be accurate. Applied.